Search

B N J M N

Music Producer, Audio Engineer

Blog 5: Industry Loudness Levels in Audio

In recent years, music producers of all kinds and ages have come across a the concerning issue of loudness levels. Mix and mastering engineers are all accusing each other of making their music too loud, whilst other say theirs is too quiet. Music consumers may be clueless about the ongoing debate of 20 years, however if you look at the loudness levels of CD’s, you’ll notice they’re about 20dB quieter in comparison to music that is released these days. Has the loudness level benchmark been abandoned in recent years?

So it’s interesting to make this observation that loudness levels have increased dramatically nowadays, but where is this going to lead us? Into a generation of exploding ear drums? Or is the human ear evolving over time in order to cope with the increasing loudness?

Despite there was no written agreement 20 years ago regarding loudness levels, there was still a cohesiveness when it came to mixing and mastering levels. These days is seems producers, particularly EDM artists are compressing, and compressing again to a point where they can override their competitors. However is this what the EDM market is craving; louder mixes? Here is an interesting video on the topic of the ‘Loudness War’ amongst producers.

So you see in the video that the loudness levels should be a choice of the consumer, not the producer. Producers have been raising the overall loudness levels of their music during the mixing stage, which in turn reduces the effect transients within the audio that were more evident prior to raising the overall level of the audio. So when the consumer is to raise the volume control, yes the music is louder, but you lose the dynamics of the piece. I guess the argument amongst EDM artists and producers, is do you need that dynamic range to exist in the club scene for example. Or do you just want it LOUD?

I agree with the conclusion of the video, I think that loudness levels for publishing should be standardised throughout the globe. There should be a unified formula for all music producers. This could be achieved by integrating a unified loudness level rule within the audio industry that would prevent producers from releasing music above a certain loudness level. So maybe a rule would not stop people from breaking the rules, however perhaps a legal rule like an official ‘Loudness Level Act’ could provide some official boundaries for the Loudness Wars that exist today.

However at the end of the day, what is the true solution? Nothing is going to stop producers from making their mixes LOUDER than others, it’s personal taste. Some people like music loud, other’s like is quieter. We really cannot control what people do, however it is interesting to be aware of what is happening out there in the industry.

REFERENCES

Matt Mayfield Music (2016, March 28). Music streaming services: Bring peace to the Loudness war Retrieved from https://youtu.be/yB7W5Gin9v0

Robjohns, H. (2016, December ). Issue navigator. Retrieved December 7, 2016, from http://www.soundonsound.com/techniques/end-loudness-war

Blog 6: Major Project Post-Mortem

So that’s a wrap! Another trimester at SAE complete and what a great one it has been. This course is really moving along at a rapid speed, and now that the end is in sight, the excitement builds to having a qualification in an area of passion. The tasks we’ve learnt this trimester, particularly relating to surround sound and mastering have been really beneficial to my learning. I genuinely enjoyed creating a 5.1 surround sound mix (the more speakers the better right?) and learning how to master is going to become very useful now for both my music and other productions in the future.

Firstly I’d like to make a really important observation before we step into the projects I have worked on for this Trimester, and that is recognising how far I have actually come this year in terms of personal development. When I actually have a read back to my post-mortem blog from my first studio unit back Trimester 3 with Steve Callan, it’s cool to reflect on that and observe where I am now and my achievements this year, particularly in music production and now film scoring.

So let’s now dive into the projects I have been involved with for Trimester 5. Upon reflecting on my studio units this year, I did an electronic EP in Tri 3 with Matt, then an electronic EP on my own in Tri 4, so I thought to mix it up a bit I could record a band this time in the studio. However, in the meantime I had some great ideas for some electronic music as well. So, I did both! Keeping in mind I did have the option to drop something if it all got too much to handle.

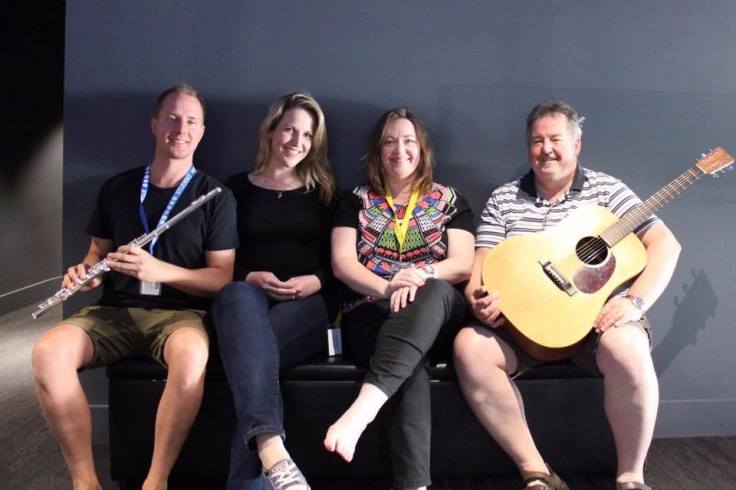
So as per my scope document I decided to record a band that I actually play in myself. It’s a four piece acoustic setting consisting of flute, guitar, piano and vocals. We performed recently at the Royal Perth Yacht Club for a 70th birthday party, lol, but it was fun! I really liked the sound we had during rehearsals and so I asked the group into the studio to record a bunch of classic cover songs as listed below:

  1. Scarborough Fair
  2. Dreams
  3. With A Little Help From My Friends
  4. Big Spender
  5. It’s My Party
  6. Money, Money
  7. My Cherie Amour
  8. Say A Little Prayer

15078818_10153913912691906_7149504078404398224_n

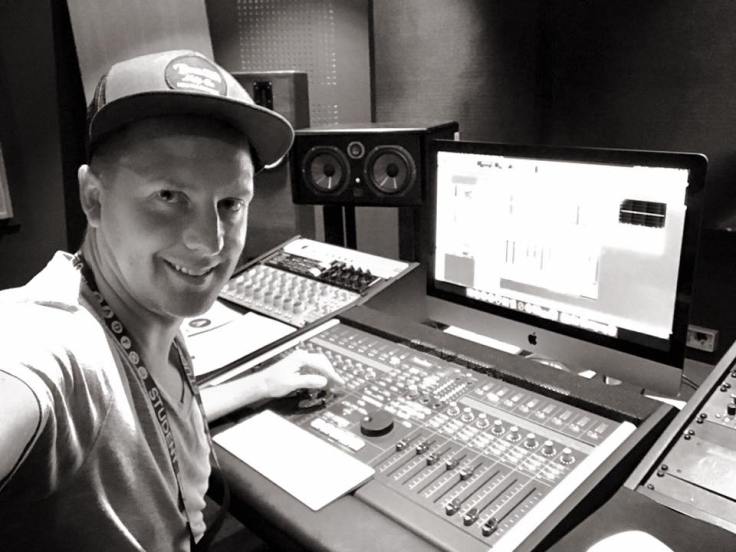
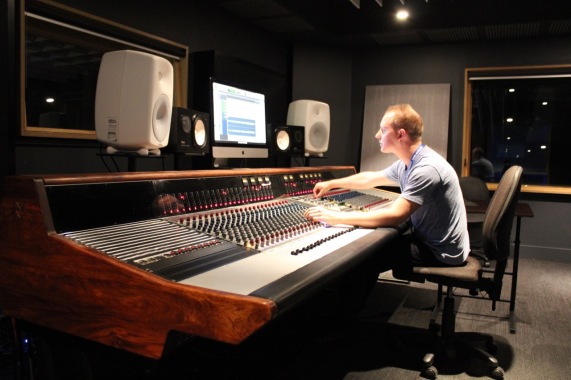
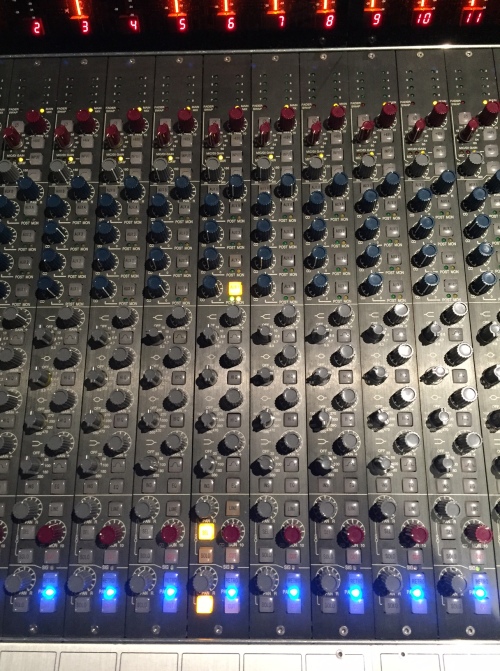
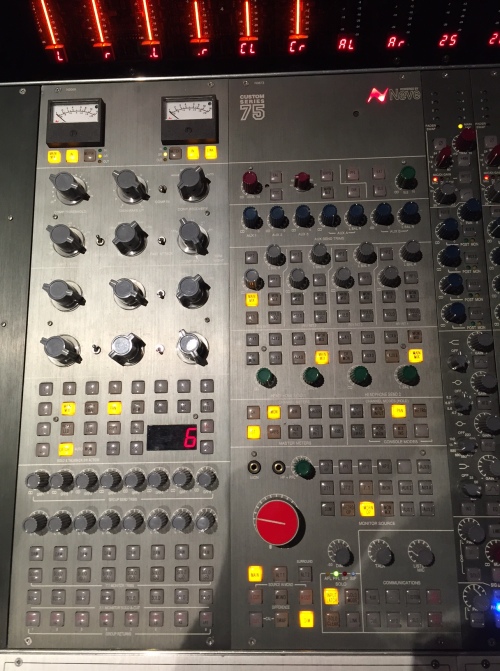
Despite running out of time towards the end of the Trimester to fully mix and process these tracks appropriately for my project, it was great to get everyone into the studio and have that experience of setting up all the equipment, practicing suitable microphone choice and placement techniques, getting signal into the C75 console and attempting to achieve the best sound possible, which was obviously the whole idea of the project. So in reflection, despite not having enough time to complete this EP as planned in the scope document, it was still a completely beneficial practise of recording live instrumentation in a studio environment and was a great experience. Recording bands in not my forte, nor do I enjoy it any where near as much as writing music, but I recognise that it is a very important skill to have, especially for recording live instruments to overdub into my electronic music and film scoring.

Towards the end of this eight hour session I had Kat (one of the vocalists) and a very good friend of mine (by the way this group is my church band I play with weekly on Sundays) stay back and record the vocals with me for a song she had written named ‘Soul Calling’. Basically she had given me the piano accompaniment that she recorded at home, and we used that as a backing track to record the vocal lead line. She had not written this song for me to produce initially, it was something that was later established when Kat said to me, “I think this track needs something a little more electronically in order to bring it to life!” I was certainly in the same frame of mind (as I usually am with Kat) and it was a collaboration that came together just beautifully in the end.

We were both extremely happy with the final result of the song. Kat being classically trained vocally and also in her self-taught piano style, the track originally had that classical edge to it, but I could hear the drive that it needed in the bass line. So the task of bringing it to life so to speak, was not only challenging but extremely rewarding in the end. I really had a lot of fun playing the role of producer and co-writer for the final result.

This track then became an extra track on the 3 piece electronic EP for the second half of my major project. To then have Kat with me for the final mix down in the mastering suite was awesome, even making a final edit to a couple of the sub bass notes in protools. To work with a singer-songwriter in this way (and also a good friend of mine) and knowing that Kat is completely on the same page as me musically, is a dream come true and only the beginning of an exciting future of music production for both of us. We look forward to writing more music together.

‘Soul Calling’ is very much a journey when you actually sit down and listen to the whole 6 minute track from start to finish. Yes, it is long. But it’s long for a reason. It’s a journey for Kat, lyrically and melodically and the lyrics reflect this clearly. As the approached producer for the track, I didn’t want to stray away from her original arrangement at all if I didn’t have to. We have spoken of various remixes and radio edits of the track in the future, even re-recording the vocals in a more ‘house’ style as Kat suggested. So it will be fun to see what else we come up with here.

So aside from that incredible addition to the electronic part of my project, I wrote three original tracks, each from a different genre of music. I wanted to not only express my eclectic taste in music, but also my ability to produce in various styles that I really enjoy.

The first track ‘Expand’ began with an awesome stepping chord progression that I played around with on a rainy day. The bass line then followed and eventually became the core element of the track, driving the piece into a piano melody that seemed to just fit perfectly to me. Add some piano melodic harmonies and establish the arrangement and bam, you have yourself a basic EDM track. I think what makes this track for me is the chord progression, that descends and ascends again over a 16 bar loop. These kinds of progressions come to me when I’m just experimenting with what sounds nice on the piano.

The second track on the EP ‘Lax’, well what can I say, I think I actually had a tear the day I finished the basic arrangement of this track. It might sound lame, but this major/minor chord progression and triplet jazzy-filled melody and groovy percussion, I’ve said to people is purely me and my soul talking. Once I got the drum rhythm right and the two chord progressions bouncing back and forth, the melodies just came together, inspired by a lot of chill-out house music I used to listen to throughout my 20’s. Cocktails and balmy sunsets by the beach is what this track represents for me and I think one of the vibes I certainly enjoy creating musically. I look forward to writing more music in this style too.

The final track on the EP is an acoustic piano and vocal piece ‘Exit’ that I wrote over the trimester about a relationship I was in many years ago and had to get out of in order to move on with my life and find out who I really was. Deep right? The lyrics don’t particularly make sense if you follow them but I used words that came from the heart that fit to the melodic phrases I had initially written when I established the chord progression. This was a lot of fun to write, I love acoustic music and this song is sort of a journey for me I guess.

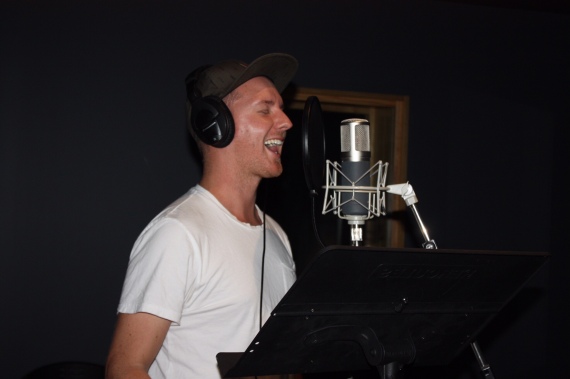
Technically speaking, the Neumann U87 was beautiful in the end and as Brandon confirmed a few weeks back, a great microphone choice for my voice. Recorded a few takes of harmonies too, which I then added into the final mix. Oh and not to mention getting my hands on a Waves Audio Tuner that was on special recently, which helps a great deal in fine tuning some vocal notes. However I’ve noticed you can easily go overboard and your vocal can begin to sound unnatural as you can slightly hear in some notes during this song. More time to shape it up better is definitely on the cards.

So that’s all my personal projects covered. There is one more rather large project that I have not mentioned as yet and this was a project that was offered to us as a class earlier in the Trimester, the audio treatment for Tri 3 film, Pablo. This was my first experience at working on a film project however it was a brilliant experience and good practise for our Tri 6 major project in which we are working on a short film as a class. Pablo is an indigenous film that required ethnic percussion in the film score pretty much throughout the film.

Personally I was a bit excited about this film as I do love African and Ethnic percussion. I find it’s extremely moving and powerful stuff. So I’ll admit it was a lot of fun working on the film score for Pablo, along with fellow student Danielle Carlow. I wrote about 4 of the scenes and Dani wrote 2 in the end. Having not scored before I was constantly checking with Jarvis the film director as to whether or not the music I was writing was creating the right feel for the scene, which was a priority for me. So when Jarvis explained that I had nailed it, I was so happy.

Again it might sound lame, but at the showcase I had a bit of an emotional moment watching Pablo on the big screen with a packed theatre of students and family members. It was a proud and special moment of having the audience subconsciously connect with the film via the scoring I had written. To see it all come together and to feel the audience connecting with the film in a certain way because of not only the story but particularly the scoring, was a moment of realisation that this is indeed my passion.

This, what was happening in that very moment, contributing largely to the emotion that is created with music attached to a visual medium. That’s what I’ve now realised I’m all about and it really was a wonderful experience to be involved with this film. To have a special thank you from lecturer Andy Hill in front of everyone to Tri 5 students Danielle Carlow and Ben Pfeiffer who wrote the original score, was a very proud moment and an awesome feeling indeed. I look forward to more film scoring and writing of music in the future and particularly for our upcoming short film ‘Unheard’ for CIU330 next Trimester. We have been in pre-production for this film during CIU212 this Trimester and I’m really looking forward to the end result of this final major project for the degree.

15390997_10153989358301906_6049727516894964410_n

Blog 4: Future of Surround Sound

“Dolby Atmos – Feel Every Dimension”  (Laboratories, 2016)

“Dolby Atmos transports you into the story with moving audio that flows all around you with breathtaking realism”  (Laboratories, 2016)

Dolby Atmos has taken the world by storm with surround sound by paving the way for creating an experience for the consumer that is the next level of realism either in the cinema or in the home theatre system.

If we take a step right back into history, movies have been around for centuries, since the 1890’s to be exact, and have always been a form of entertainment, catering to the tastes of individuals with all kinds of genres. If we look at how technology has improved over the years, films have also progressed dramatically. Audiences expect more from every release, but this poses the question, how much more is there to give?

Movies have advanced to incredible levels and with computer animation now as advanced as it is, props and even humans can be transformed into non-human characters for eg. Avatar, that you can also experience in 3D.

Gone are the days of stereo audio being enough for the consumer, we want more, we want realism, we want to feel as though we are taken on a ‘real’ experience. With the introduction of Dolby Atmos 5.1 Surround Sound, the audience becomes more immersed than ever.

atmos-overview

Then of course the introduction of Dolby Atmos 5.1.2 and 5.1.4 where sound is also projected from the roof of the room, creating an even more ‘real’ experience for the consumer, referred to as 3D sound. Not only are you receiving sound waves from a horizontal perspective, but also vertically. The same way a 3D image increases the realism of a standard 2D image.  Perhaps even more ‘real’ than real itself?

It is important to note however that in real life, we as humans are more sensitive to sounds coming at us from a horizontal dimension as opposed to from above vertically, so although you would expect more from an added vertical dimension, surround sound designers are focussing on increasing the horizontal dimension, as we are more responsive to this region and can become immersed deeply in the sound field. After all, we rarely receive sound reflections from above, so downward roof speakers can be very unnatural.

Virtual Reality is another marvel of audio and visual technology which is a concept we are all familiar with these days. This kind of technology takes you instantly into another virtual world, generating realistic sounds, images and other sensations that replicate a real environment. NASA is using virtual reality technology to train astronauts and simulate life on other planets ie. Mars. It’s the most accurate way for astronauts to understand the environments they could face.

samsung-gear-vr-most-innovative-companies-of-2015_02

In terms of visual media advancements, hologram technology has taken a new height recently with objects including animals and people that appear as though they are in the same room but are made purely of light. This kind of technology is bringing the human interaction element back into technology.

With the recent invention of the Microsoft HoloLens, the first fully untethered holographic computer, which brings 3D holographic content right into our world by enhancing the way we experience life beyond our ordinary range of perceptions. Car companies such as Volvo are designing vehicles which include this technology, even universities are redesigning the way students learn. Most incredibly NASA is using HoloLens technology to explore planets holographically.

0feb7a56-f8c1-45e1-a412-a7edf8141f4e

So where do I think the future of surround sound and visual media is going? That’s a great question, we don’t really know where it could end up. However my predictions are that based on the enhanced human experience that these advances bring, we as consumers will want to experience this heightened level of humanism as much as we can afford it. HoloLens technology may only appeal to certain organisations in its early stages of development. Surround sound advancements have grown and many homes experience 5.1 surround sound in their homes, but could this lead to completely virtual homes with a heightened level of sound experience in every room? Only time will tell. I don’t believe films will be replaced entirely as a form of entertainment with this kind of technology, however we may discover that the cinematic experience becomes even more interactive over time.

REFERENCES

AVForums (2014, March 12). The future of surround sound? Auro 3D Retrieved from https://youtu.be/6RjP-TDMxjA

Future HD (2016, January 9). Top new technology inventions in 2016 that will blow your mind Retrieved from https://youtu.be/ta9HcTEsSoM

Laboratories, D. (2016). Upgrade your audio experience. Retrieved November 28, 2016, from http://www.dolby.com/us/en/brands/dolby-atmos.html

TED (2016, April 18). The dawn of the age of holograms | Alex Kipman Retrieved from https://youtu.be/1cQbMP3I5Sk

Blog 3: Studio Signal Flow

This blog requires choosing a studio at the SAE Perth campus and completing a comprehensive signal flow. I’ve chosen to do a traditional BLOG entry as opposed to a VLOG for various reasons. Firstly I’m not the most tech savvy when it comes to making good videos, secondly I usually despise the sound of my own voice, and thirdly, unlike many audio students, I actually don’t mind writing. So here it goes.

I’ve chosen the Custom 75 desk for my signal flow BLOG, which is the largest desk on the Perth SAE campus. It’s a 40 channel desk of which we were required to have a 1 on 1 signal flow practical assessment on during Trimester 4, so this will be a bit of a refresher for me. It’s also the desk that I will be recording my 4 piece band on during week 9, so again, it’ll be a great refresher of the signal flow for this particular piece of hardware.

img_3680

The first step of the signal flow is to make sure you have some talent in your recording room ready to go with their instrument. After attaching the appropriate microphone to an XLR cable, plug the opposite end into the appropriate input channel at the stage box which corresponds to the control room next door. Make sure you know which type of microphone you are using and whether or not you’ll need to engage phantom power during setup of the console.

Once the mic is plugged in you’ll need to turn phantom power on (for a condenser mic) then you’ll need to check the gain level of the signal. You’ll want to turn this up until you get a nice healthy signal without showing any signs of clipping. Make sure your musician plays their loudest during the gain check so that you avoid any unexpected clipping during the recording process.

img_2986

Next in the signal flow we have our AUX pathways. By default these paths are set as a pre-fader listen. That means anything sent to an AUX channel will not be affected by the master fader of the channel down the track. On the C75 however, we have the option to rout this to post-fader listen, or to our monitors, or in fact both. This selection is reflected by the lights that illuminate depending on which option you choose. Primarily, we use the AUX sends for headphones into the recording room next door, so that the talent can hear themselves, as well as communication between the audio engineer and the musician during recording.

To create a headphone send you need to select AUX A (press this on the channel strip and the light will illuminate indicating a selection has been made). You need to then make your way over to the centre of the console and make sure the AUX master switches are turned up and set it so it sends the signal to the headphone send A (which will also illuminate when pressed).

Next we have our EQ section. The C75 desk allows us to configure the level and the bandwidth of each of these frequency sections. We have our low, low-mid, mid-high and high frequency parameters that we can tweak to our liking on the desk.

This is followed by our MONITOR section which we control with the maroon panning style knob to adjust our monitor level into the control room. Below this is the main feature of this desk which is a RETRO mode, which emulates the sound of the classic 1970’s NEVE circuitry, or when deselected emulates the clean sound of modern circuitry.

img_3271

Now we reach the fader section of the channel trip and we need to raise this to unity so that the signal can be passed post-tape into the DAW, but we still can’t hear anything just yet so we need to move over to the MASTER panel of the console in the middle of the desk.

The C75 also features a compressor with various functionality for all your compression needs. Our AUX masters and headphone sends also live in this section of the console which we covered earlier.

img_3270

The large red dial in the centre of the console is the overall monitor volume switch for the console. We need to make sure this is turned up so we can hear what our musicians are playing. Below this is our talkback function so that we can communicate with our talent via their headphones.

Last but not least, we need to make sure we turn up the two red L&R mix and MASTER faders to unity. Since we haven’t routed any of the 40 channels into assignable groups, we won’t need to worry about the grouping section of the desk. The purpose of grouping is so that when mixing, you can adjust the level of all the drum mics for example, as a group rather than having to adjust channels individually.

Now making sure we have all our correct inputs and outputs assigned to our channels in the DAW, and the tracks are record armed, we are ready to RECORD!

Blog 2: Music Production

As per the AUS230 Learning Outcome 01, the requirement is to critique the technical and musical aesthetics of two different styles/genres of music or soundtrack. I’ve chosen to discuss the two studio albums of UK brother’s Howard and Guy Lawrence, known as Disclosure. Both albums clearly represent different intentions in styles of music in the way they have been produced. You can see below how this reflects in their album artwork as well. One is quite innocent, childlike and playful, however the other is dark, serious and intense.

e117b531.jpg

Caracal.jpg

Their debut studio album ‘Settle’ was released on 31st May 2013 and despite the mixture of influences the genre is labelled as ‘UK Garage’ and ‘Dubstep’. The intended audience reflects this genre and was the style that fans initially associated with the name ‘Disclosure’. Their second studio album ‘Caracal’ was released 25th September 2015 and is also labelled as ‘UK Garage’ and ‘House’ however leans towards the laid back slower pace ‘House’ genre. In terms of production I personally think Caracal is of a much higher standard, however the duo have been criticised by fans for not sticking to their original style as portrayed in the debut album ‘Settle’. ‘Caracal’ to my ears, offers more layers and technical detail in terms of how they’ve processed sounds and produced more complex synth patches and sound envelopes. Again to my ears, the album as a whole sounds as though it’s been mastered to a higher standard as well. Below is a link so you can have a listen to the style of their debut album ‘Settle’.

The debut album ‘Settle’ features well known tracks such as ‘White Noise’ which includes the smooth vocals of Aluna George and ‘Latch’ featuring the outstanding falsetto of Sam Smith. Most of the tracks on this album sit between the 120-130 BPM mark which is fairly typical for a garage track. It’s that uptempo energetic feel that gets you out onto the dance floor in a club or festival environment. I went to see their Australian tour for this album back in 2014 and to say the least, the crowd was certainly bouncing throughout the entire show. As the album features collaborations with a number of well-known and upcoming vocalists, 9 in fact, the album became extremely popular amongst not only Disclosure fans themselves but also fans of the featured vocalists. Below is a link so you can have a listen to the style of their second studio album ‘Caracal’.

‘Caracal’ released two years later during 2015 was a slightly different scenario in terms of production and whilst all the true fans know how to appreciate anything these brilliant artists produce, there is quite a percentage of fans and critics who would disagree with the direction of their second album. Here’s an example of what one fan had to say…

“The general consensus seems to be that Caracal is “underwhelming”, to which I unabashedly say: “oh, horseshit.” Pick any one of its 11 tracks and press play (I suggest “Superego” feat. Nao), and tell me it’s not better than 90 percent of whatever’s playing on your radio.” (Bein, 2015)

In my opinion, the overall feel of this album is far more laid back and relaxed, quality not quantity I would suggest, and by that I mean there’s a tonne of quality production techniques used as opposed to quantity ie. how many similar sounding garage tunes with repetitive hooks can we pump out in one album. Once again there are a number of collaborations, 10 this time, again with well-known featured vocalists and this made for a brilliant promotional tool in the months leading up to the release of the album. This time Howard himself is featured as vocalist on 4 of the tracks, which even with his limited vocal range, turned out to be quite impressive.

This brings me to my final point which is that ‘Caracal’ features as little as only 2 Garage based tracks, that being ‘Holding On’ and ‘Echoes’ as opposed to ‘Settle’ where about 50% of the album is Garage focussed. So you can see here a clear shift in style and aesthetics when comparing both albums. I was lucky enough to see them again during their ‘Caracal’ tour in January this year and even though I absolutely adored every second of the show, I could see the general crowd weren’t dancing and bouncing anywhere near as much as they did during the ‘Settle’ tour and I think this is a clear reflection of the change in style and aesthetics between the two albums.

REFERENCES

Bein, K. (2015, October 2). If disclosure’s “Caracal” is Underwhelming, it’s your fault and not theirs. Retrieved October 16, 2016, from https://thump.vice.com/en_us/article/if-disclosures-caracal-is-underwhelming-its-your-fault-and-not-theirs
Brown, H. (2013, May 30). Disclosure, settle, review. The Telegraph. Retrieved from http://www.telegraph.co.uk/culture/music/cdreviews/10087459/Disclosure-Settle-review.html
Fallon, P., & Advisor, R. (2015, September 28). Review: Disclosure – Caracal. Retrieved October 16, 2016, from https://www.residentadvisor.net/reviews/17601
Smith, M. (2015, September 25). “Caracal” vs. ’Settle’: A comparative review with album streams. Retrieved October 16, 2016, from The Musies, http://themusies.com/2015/09/caracal-vs-settle-a-comparative-review-with-album-streams/
Wood, M., & Times, L. A. (2013, June 7). Album review: Disclosure’s endearingly exuberant ’settle’. Retrieved October 16, 2016, from http://www.latimes.com/entertainment/music/posts/la-et-ms-album-review-disclosure-settle-20130606-story.html

Blog 1: Free Kontakt Instrument Review

The ‘Steinway Grand 3’ is a free demonstration version downloaded from sampleism.com by Hephæstus Sounds. It is a sampled Kontakt instrument ‘replicating’ a traditional Steinway & Sons Grand Piano. Not surprisingly, a real life Steinway remains the preferred instrument of concert artists, as well as countless pianists, composers and performers around the world. So it’s no surprise that developers would want to create a Kontakt instrument attractively named ‘Steinway Grand’.

Screen Shot 2016-09-22 at 4.54.03 PM.png

If we take a good look at the interface of the instrument, the overall colour is black, which is a great choice as we know most Piano’s are in fact, black. There’s a lovely image of a shiny Grand Piano on the left, which adds to the authenticity of the interface. I like the use of white text on the black background in the description title and also the function labels. There are two sections on the interface, one of them reads ‘sound’ while the other to the right reads ‘effect’. In the ‘sound’ section we see five different adjustable parameters/functions:

  1. Distance
  2. Stereo
  3. Soundboard
  4. Presence
  5. Exciter

In the ‘effect’ section of the interface we see three adjustable parameters:

  1. Realism (adjustable in full version only)
  2. Reverb
  3. Size

Features of this free version include the 48KHz 24-bit stereo sample resolution, which tells us the sample rate and bit depth which relates to the audio quality of the samples. This represents the highest quality of samples, which means the clarity will be ideal. It also features five perfectly connected dynamic layers. These are the velocity layers that are recorded so that realistic piano dynamics can be used when playing or recording MIDI data in a DAW of your choice. It also features semitone-per-semitone sampling, which is used to transpose your midi data up or down as far as 36 semitones either above or below your original MIDI notes, great for quick transposition without having to shift your MIDI data. It also has the ability to sound up to 32 notes polyphonically (128 in the full version). This means that the engine has the ability to sound up to 32 samples at any one time.

Screen Shot 2016-09-22 at 4.54.44 PM.png

After recording some MIDI piano into Ableton and having a play around with this free instrument myself I had a good listen to each of the functions and how they change the sound during playback. The ‘distance’ function allows you to move the instrument closer or further away from the recording source, similarly the way you would close or distant mic an instrument in the studio. Then we have a ‘stereo’ function, this is used to widen or reduce the stereo image which adjust the fullness of the sound on stereo monitors. I like the ‘soundboard’ feature, this allows you to add that touch of realism to your sound by adding recorded sounds of the strings ringing, sustain pedal usage and the string dampeners. This adds a very realistic edge to the sound. There is also a ‘presence’ function to boost the presence of frequencies and also an ‘exciter’ function which allows you to add a bit of a twang to the sound or subsequently reduce it to soften the notes. There’s also a 3-band-EQ perfectly tuned on the most important piano frequencies.

To the right in the ‘effect’ section of the interface we see functions of ‘realism’ which is only adjustable in the full version. I assume that this function allows you to adjust how ‘real’ the instrument sounds which could increase CPU usage. We also see functions labelled ‘reverb’ and ‘size’ which allows us to adjust how much reverb is applied and also the size of the reverberant space, as you would in synth programming or many other reverb plug-ins. Below you can have a listen to a sound demonstration I prepared of this Kontakt instrument. The piece is called Winter Sun by Kerin Bailey.

Blog 3: Major Project Post-Mortem

This is a final reflective blog for 16T2 which in my case is Trimester 4 of the Bachelor of Audio course I’m currently studying at SAE Institute. In this blog I will be reflecting on my major project for this trimester, which is an original three track tropical house EP, influenced by the tropical style of Norwegian producer/artist Kygo.

Tropical House is a sub-genre of deep house which is a sub-genre of house music. It possesses typical house music characteristics, usually with a 4/4 kick drum pattern and synthesiser instrumentation. It usually includes tropical instruments such as steel drums, marimba and typically a pan flute sound for melodic phrases or hooks.

It’s described as uplifting and relaxing but at the same time still gets up to dance. This is why over the last century tropical house is becoming extremely popular across music festivals around the world due to its mix of catchy, bright melodic synths and latin percussion instruments.

Kygo is a Norwegian DJ, songwriter, record producer and pianist. As a piano player myself I was very inspired by Kygo after watching various interviews of his production style and technique of starting out on the piano with chord progressions and melodic ideas and then switching these ideas over to the computer on Ableton in my case, to produce and build these ideas around the basic chord progression, which I agree, is where it all begins.

So that was the exact approach I took for this major project. I spent a few weeks initially just solely on the piano itself, figuring out some nice flowing minor key chord progressions (because minor keys have more feeling in my opinion). So the very first step for me once establishing the chord progressions were playing/recording these via MIDI into Ableton, establishing a rhythm and tempo that felt right too. Once that was set, I could start building the tracks around this, trying different sounds and seeing what works and what sounds good. This has been my first experience of writing an EP completely on my own, so there has been a tonne of self directed learning that I’ve had to research in order to achieve the sounds I’ve had in mind or that I hear in my head and wish to execute successfully.

This process has been so exciting and because I’ve chosen a genre, firstly that I love and secondly where the percussion is simple yet effective throughout, it’s been something I’ve been able to manage on my own throughout the project, which has been so rewarding when listening back to the final mix and a great sense of achievement.

Rather than just an electronic track, as stated in the project scope, I wanted to try and use the studio recording skills I have developed during my time at SAE as much as possible by recording as much percussion as I could in the studio. So I had a few percussion instruments at home, for example, tambourine, clave, chimes, cabasa, wood block, finger clicks and claps which I processed and sampled out using Protools and imported to Ableton. I also decided on hiring some congas to record a nice deep rhythm throughout in the song ‘Twilight’. My Dad is a percussionist and played professionally in Sydney where I was born, so I got him into the studio and onto the congas to slap out a nice rhythm that I had figured out with him. Once he got into the swing of it, he had a lot of fun.

Recording the congas went well. I researched the best way to record congas and referenced a great ‘Sound on Sound’ article called ‘Recording Latin Percussion’. I took away some tips re. microphone choice and placement and also compression and EQ during processing. I used a couple stereo pair of C414 as overheads and an AKG D112 dynamic underneath between the congas to capture that bottom-end resonance from the drums. We did a couple recordings of the entire track and once at the editing stage in Protools I had a close listen and after a little EQ and compression picked out the best fills to add to the mix over in Ableton. After adding some tasteful reverb parameters to the track they began sounding close to what I had imagined so was very happy with the result. I ended up removing every second fill as I preferred not to hear it every bar of the track, it was a bit too much I think. So all in all, it was quite time consuming however gave me a challenge that I really enjoyed as part of the production process for this project.

I really enjoyed experimenting with the chimes samples I made and in the track ‘Dream’ I tried reversing these samples and adding reverb and it made such a nice transition between new sections where instruments are introduced or removed etc.

Once the chord progression was recorded via the piano, an arrangement was set in place and basic percussion added, I was ready to start writing melodies with this fantastic layered pan flute (breathy ‘noise’ parameter in Massive) and a pluck lead patch that I’d researched and created using the Massive plugin. This was my first time using Massive in my own project so there was lots to revise from last trimester with regards to synth programming, but once I had the sounds I wanted and tweaked them accordingly I gave myself the official green light to go ahead with writing the melodies.

As these tracks do not feature any vocals, I kept them as instrumentals, so I wanted the melodies (like in a lot of Kygo’s music) to really stand out, have an edge, a level of syncopation to the chord structure and be positioned right at the front of the mix, as a vocal typically would. Writing melodies is definitely my forte when when it comes to the writing process. Give me a chord progression and melodic rhythms just seem to flow out. Then I add the harmonies after that and they are usually a major third above the melody however sometimes I would put them down the octave to widen the melodic spectrum which really worked well and sounded great when repeating a melodic phrase in order to change it up a bit for the listener.

Bass lines, again, they are simply build based on the chord progression the same way the left hand plays the bass note of the chords you play on a piano. So that was fairly straight forward. In ‘Twilight’ I experimented with some octave movement in the bass line to funk it up a little, which sounded great. I also researched how to make a bass drop in Massive which you hear numerous times throughout my three tracks. I wanted to keep certain sounds similar across each the tracks so that the listener feels that they link together in some way as an overall EP.

The next area that I had a lot of fun with and which was absolutely necessary was the wonderful use of automation. EQ sweeps using automation is something that I believe really makes an electronic track. When they are added tastefully they create all kinds of beautiful movement within in your track, and I especially found it great to use it during a break down in the song or at a time when you introduce or fade out certain instruments. Playing around with these settings took a very long time but once you hit the right spot, you know it’s right.

Many hours were spent just plainly sitting back and just listening to the tracks, whether you lie back on the bed looking away from the computer or even walk into a different room so you can hear it from a distance. It’s amazing what sticks out when you walk away from the computer, making it easier to figure out what else you may need to tweak or change.

Once I was happy with the tracks and the mix, I was a little concerned with my levels in Ableton. This is something that I’m always cautious of as you can get a track sounding great however some tracks with the Massive plugin in use were peaking and I was getting pops and clicks through my monitors. Using a limiter on the master track fixed this problem and created a ceiling so that the tracks no longer continued to peak too high.

The tracks then had to be exported from Ableton and imported into Protools for final mixdown. As each track is stereo I had to split them to mono for final mixdown on the C75 desk, which I’m really looking forward to. Will be great hearing the tracks on some bigger and better monitors in the control room at uni and tweaking anything I need to from there before recording the final mixdown back into Protools for a final stereo bounce out.

This is my very first solo produced EP and I’ve loved every moment, from deciding on the chord progressions on the piano to choosing rhythms, sound design and synth programming, recording live percussion instruments, writing melodies and harmonies and adding filter sweeps and bass drops, it’s been exciting and far beyond anything I expected to achieve. After not knowing where to even start when it came to software based producing, to be writing music is a dream come true and only the beginning of an exciting creative journey ahead.

Blog 2: Live Sound Reflective Evaluation

The purpose of this blog is to reflect on the live sound practical sessions and training we as a class have received over the past 7 weeks of the Trimester from Ben Morris here at SAE Institute, Perth. I thought I would address this as a week by week discussion of both the issues and challenges we faced as a team as well as the outcomes as a result.

During the first week’s practical class we were all placed in the room with all the live sound equipment and Ben gave us a good run through and an explanation of each item in the room. He went right down to the basics of design of the speaker units, the sub speakers as well as the components that make up the live sound setup including the digital and analog desks and the differences between them. He also gave us a basic verbal instruction of the setup of the gear and how the sound travels in a live situation.

In the second week Ben had us in the room with all the equipment again, however this time we were asked to set it all up ourselves based on our audio knowledge thus far. He left the room and when we returned gave us feedback on where we could have improved and where we went wrong. Although at the time I thought it would be a better process to actually show us the correct way of setting the gear up first, however in reflection I believe this was probably the best way to learn. Some of the feedback I took away with me from this process was that the FOH speakers and sub need to be in front of the fold-back wedges. Also, the cables for these speakers must always run behind the fold-back wedges. So if you can imagine a line of cables  in a straight line behind the FOH speakers and in front of the fold-back wedges. This keeps cables out of the way of the musicians feet on stage etc.

Another thing that Ben mentioned and I thought was interesting was the angle of the FOH speakers. They must always be directly front on to the audience and not on an angle towards the engineer as you would with monitors in the studio, which I thought was quite humorous that we automatically set them up in that way, as did previous groups as Ben mentioned. Proves that we get so used to setting up monitors in a certain way throughout the course. The reason they need to be front on is to avoid phasing issues with the sound emitted from the speakers.

Another important point was to make sure the excess of cables is closest to the speakers and not the desk. We were also shown how the analog mixer works including some effects (that are not so great). We also activated the outboard Lexicon effects unit under the digital desk. We were shown how to check the signal from the desk through the units. It is important that the Amps for the speakers are always powered last. In the recording room 1 space at SAE Perth, the Amps must only be set to only 2 clicks for FOH left and right (top amp) and 6 clicks for the Subs (bottom amp) because of the small and sound absorbent space. We were taken through the signal flow and set up from the desk to the speakers and Ben was impressed as we had set this up correctly as a team. I made myself a dot-pointed list of the signal flow on this day to help me remember the order when connecting the cables. My learning style is visual so I usually need to see things like this written down as opposed to just hearing it verbally. The order from the desk is:

  • Desk
  • Graphic EQ
  • Compressor
  • Crossover Unit
  • Amplifiers
  • Speakers

It came in handy to remember this signal flow when connecting everything up for the first time. I think it’s important to remember this signal flow for any live sound setup in the future.

During the third week’s class Ben split us into two separate groups so that Ben could show us how the Yamaha LS-9 digital desk works. At the time I remember finding this desk a little overwhelming and thought that learning this desk would take a bit of time as it consists of menu’s within menu’s etc. However I managed to understand how the layers worked and as a group we were able to set up and troubleshoot and resolve any issues we had. I think our Amps were not on the ‘Dual’ setting on the back which means our mono signal needs to be distributed evenly to both L and R FOH signal paths. Apart from that, Ben said he couldn’t pick on our set up at all which was awesome feedback. He left the room and asked us to send some reverb and delay to the left and right fold-back speakers and we managed to figure it out in the end which I’m still a little confused about but hopefully it sinks in next time.

In week 4 there were only 3 of us, myself, Matt and Nathan and after setting up and connecting everything after the earlier group that day, we were shown the larger cable and the very complex process of how to connect it. During the class we were also shown how to ‘tune the room’. This means removing the frequencies on the Graphic EQ that surface as a result of ‘feedback’, which gives a different result based on the space you are using. By removing these frequencies on the Graphic EQ we remove any chance of feedback during the live performance. We also learnt about how to autotune the room via the Crossover unit. This unit scans for feedback frequencies automatically by using the small microphone and place it centred in the room and connected straight into the front of the crossover unit.

Weeks 5 and 6 we remained in our groups and established our positions of either FOH Engineer, Monitor Engineer, Systems Tech, Stage Manager and Recording Engineer. Again we got to have a practise run of these positions in week 6 and this was a good run through of the assessment which took place in week 7.

I took the position of Monitor Engineer so my role was to place the monitors and the analog monitor desk into position ensuring that they are all connected appropriately. During setup I ensured that the main digital desk outputs were connected via channels 1, 2 and 3 to the monitor desk inputs. I then had to connect an AUX 1 send cable to the monitor Graphic EQ input, then out of the Graphic EQ and back into a red return cable on the thick cable which runs to the stage box and onto the fold-back wedge. During the assessment we had lecturer Wayne Hodges join us so we set him up with a vocal mic, acoustic guitar DI box and a fold-back wedge.

We only had a small group of 3 for the assessment in the end, just myself, Dani and Matt. So rather than just sticking to our specific roles, we ended up helping each other out a lot and a lot of our roles and duties crossed over, which if you had more people would become messy however considering the circumstances we worked well together. So after I had set up monitor desk, wedges and cables, I then moved into the Systems Tech role with Matt and assisted with connecting the desk to the EQ to the compressor to the crossover, to the amps and of course through to the FOH speakers.

We had a couple of issues here and there during our set up, firstly with complicated task of connecting the multi cord then the issue of many of the channels not working due to the connection not secured properly, which is not an easy job even for Ben. We also had an issue with sending the reverb from the digital desk through to the monitor desk so that Wayne could be given some reverb through his fold-back wedge during his performance.

One of the errors I made myself during setup was the input and output cables were the wrong way around in the back of the Graphic EQ. Once we realised we weren’t getting any signal to the wedge I simply followed the signal flow from the main desk and through to the wedge and discovered where I went wrong. I learnt here also that it’s very important to make sure all the gain and AUX pots are down when adjusting cables, including the levels on the wedge itself, as we had a feedback scare when I was fixing the cable setup. Another thing that Ben told me was during sound check, to make sure the reverb and signals through the AUX channel are working correctly then just turn them all down until the musician requests some reverb from the Engineers. Also levels from the guitar and vocal can be adjusted upon request.

Overall I think myself, Dani and Matt managed really well for the assessment considering there was only three of us in the group. We all assisted each other where necessary to get the job done. During recording, Dani was focussed on ProTools, I was focussed on the monitor desk and Matt focussed on mixing and EQ on the desk.

Although we were thrown in the deep end on many occasions throughout the last 7 seven weeks, I feel I’ve really learnt a lot about the live sound setup, the signal flow and the typical roles that take place during a live sound setup. I look forward to using and applying this knowledge and training during the live sound pracs that we undertake at The Boston next door from Week 11.

Blog 1: Film Score Genre

In this blog post I’ll be making an evaluation of two film scores from two different genre’s of music. I’ve chosen a couple of Academy award winning films, one a 1999 comedy/drama film called ‘American Beauty’ and the other the science fiction 2009 billion dollar box office success Avatar. In this evaluation I’ll be making a thorough analysis of the musical characteristics of a section of the score of each discussing the rhythm, melody, harmony, timbre and form. I’ll also be discussing the musical instruments used to produce the sounds and also the production techniques used for each piece of music.

Firstly ‘American Beauty’, this 1999 comedy/drama film has a certain mysterious theme that composer Thomas Newman has cleverly written. The original motion picture score contains 19 tracks and I’ll be focussing on track 1 named ‘Dead Already’ which is the opening soundtrack of the film. Here is a YouTube video of the music if you’d like to have a listen before I break it down.

Thomas Newman has kept this score and in particular this track incredibly simple yet extremely effective and I’ll discuss exactly why. Firstly the time signature of this song has a 6 pulse crotchet beat per bar which tells us there’s 6 beats to a bar so I believe it’s in 6/4 time however could also be 6/8 time signature with 6 quavers to a bar. Either way there are definitely 6 beats to a bar which gives it an interesting feel to begin with.

The piece is in the key of C minor. At the beginning we hear a 4 bar intro with a beautiful marimba instrument playing a 2 note C minor melody and harmony pattern (saturated with reverb) which is very distinct in its sound and I think it’s inviting to the ear. It’s a syncopated rhythm and creates a simple yet mysterious emotion for the viewer/listener which I think is very suitable for the genre of the film.

After a suspensful short pause another 4 bars is played and gradually the song begins to build as the same pattern repeats however a large/deep drum sounds on beat one of the bar adding depth and more emotion to the overall sound. A Bongo rhythm and a background descending synth is added. A whistling sound effect is introduced along with more percussion sitting with the bongos in the mix. At about 55 seconds into the track another percussive instrument is added on the 1st beat of each bar. Around 1 minute we are introduced to a warm low frequency pad/synth effect and also what sounds like a flute melody low in the mix which then leads into the next section which includes a fast strummed guitar rhythm.

At 1.45 a bass note sounds on the second beat of each bar before the base line is properly introduced. As you can can hear this track builds very slowly yet effectively. At 2.07 a piano is introduced which mirrors the marimba that is further back in the mix at this point. At 2.27 we hear a drum roll as instruments build and return to this section. Please take a quick look at the following YouTube video which is Shannon Rogers’ arrangement for Ferny Grove Percussion Ensemble performing a combination of the main theme tracks from ‘American Beauty’. What an incredible arrangement and performance and gives you a clear picture of the instruments used in the original score by Thomas Newman. I love the delicacy of the beginning and end and was deeply moved watching this powerful performance. It demonstrates the intensity Thomas Newman has created.

The second evaluation I am making is on director James Cameron’s award winning film ‘Avatar’ for which the original score and songs were composed, co-orchestrated and conducted by the well known James Horner. Horner also composed alongside Cameron’s succesful ‘Aliens’ and also ‘Titanic’ films. James Horner is an incredible composer famous for the integration of choral and electronic elements in many of his film scores, and for his frequent use of motifs associated with Celtic music. I’ve chosen to analyse a piece from Avatar named ‘Jake Enter’s His Avatar World’. It’s a very moving scene and James Horner creates the distinct emotion with this spectacular orchestrated arrangement. Have a listen below.

At the beginning of this incredibly moving piece of music you hear an assortment of orchestral instruments. First a powerful steel drum roll followed by flowing violins and violas playing quavers through a beautifully phrased ascending minor scale with melodies and accompanying harmonies. With a gentle 4/4 beat, a second melody falls gently underneath before a smooth stringed chord where we hear deeper strings including cello’s and perhaps a double bass.

At 27 seconds a light twinkling melody begins which consists of a piano and a beautiful harp playing two notes back and forth one octave apart creating a sound that reflects raindrops or the dew you’d imagine in the garden early in the morning melting away as the sun rises. The piano and an oboe bring in another gentle melody around the harp and a continued upper note on the strings sits throughout. At 1.00 a large cymbal crash takes us through to the next section of the score and the piece begins to build. Here the harp is playing a semi-quaver arpeggiated rhythm whilst the strings go into a plucked staccato quaver rhythm. I feel that this rhythm creates the feeling of the characters tiptoeing through the magical forest of the new world. The warm horns are introduced here as well which helps to build and add depth to the score.

At 1.24 the horns build up more with some dark chords that create a spooky and mysterious feeling for the audience. These flowing notes build and increase in volume and the overall dynamic builds. I personally think there’s nothing like the deep emotion that a full orchestra is capable of creating for a film. As Horner states in regards to this film, “Even though the characters are these newly created beings in some weird world, you still have to touch people’s hearts with the music so that they connect with the characters.” (Heyuguys, 2015)

The musical goal with Avatar was to create a score using traditional film sensibilities however at the same time introduce music that represented a new culture and world to the audience. The producers and directors used what’s called an ‘ethnomusicologist’ which is someone who has a wide knowledge of many diverse cultures, to work and create with James Horner.

“We had to create a convincing atmosphere in the absence of the two principal sources for achieving musical color in film: indigenous musical material and culturally identifiable musical devices.” (Bryant, 2016)

The idea was to create alien music without alienating the audience. Horner was asked to create unusual musical sounds that no one has heard before, in other words, sounds that the average movie-goer would not readily recognise as belonging to a specific culture, time period or location.

I found it interesting through my research that the original process of creating the music for this film was to watch the characters and really try to imagine the music that these newly created characters would produce in their world. Horner usually chooses the instrumentation first and then lets the melodic material evolve from there. Attached below is the scene from the movie Avatar that features the piece I have discussed where character Jake enters the capsule and goes deep into the Avatar world.

References

1mannlan (2010, March 19). Avatar soundtrack Promo – the complete score – CD1 – 05 – Jake enters his Avatar world Retrieved from https://youtu.be/K5P2_YuFvzs?list=PLB3AAABA799EB6107
Avid (2010, March 9). Avatar Retrieved from https://youtu.be/sfvwUBNg-X8
Bryant, W. (2016). Creating the music of the na’vi in James Cameron’s Avatar: An Ethnomusicologist’s role. Retrieved June 10, 2016, from http://ethnomusicologyreview.ucla.edu/journal/volume/17/piece/583
DP/30: The Oral History Of Hollywood (2013, April 9). DP/30: Avatar, composer James Horner Retrieved from https://youtu.be/Qrcuw9D92_s
Ferny Grove SHS Instrumental Music (2010, September 14). American beauty Retrieved from https://youtu.be/WjB_QGUx0G8
FilmScoreBuff (2012, May 22). American beauty score – 01 – dead already – Thomas Newman Retrieved from https://youtu.be/hrU3EppRwNA
Heyuguys, S. (2015, June 23). Titanic composer James Horner in one of his last TV interviews: “You have to touch people’s hearts” – videoRetrieved from https://www.theguardian.com/film/video/2015/jun/23/titanic-composer-james-horner-tv-interview-video
JuxTPosition’s channel (2011, March 6). “American beauty” – Thomas Newman (from the “plastic bag scene”) Retrieved from https://youtu.be/gHxi-HSgNPc
officiaIavatar (2010, January 7). Scene from Avatar number 2 Retrieved from https://youtu.be/7ogLskyjxwc
OxfordUnion (2016, March 11). Thomas Newman | full Q&A | Oxford union Retrieved from https://youtu.be/oeHNUJ-hNmE


Create a free website or blog at WordPress.com.

Up ↑